Below are the Water Kefir instructions on how to keep your water Kefir healthy and happy. Download them and keep your Kefir healthy and happy.
Instructions – How To Set Up Your Water Kefir

Congratulations on buying your Kiefer grains. Your grains have been dispatched in a cool container and will take a day or two to recover.
Live Culture: Do not strain the old water from the package. It contains microparticles of Kefir that will grow. Place the entire contents into 1lt of sugar water as directed.
Dehydrated Kefir:
First, Add the contents of the bag to 250ml of fresh sugar water and leave overnight.
Second, Drain the water and then follow the directions below.
Equipment that you will need.
Water Kefir Instructions – Everything that you use for Kefir should be stainless steel or plastic and must be sterilized before use by boiling for 10 minutes in water. Dehydrated Kefir may take up to 30 days to start producing properly. They need to be treated as below every few days to keep feeding them.
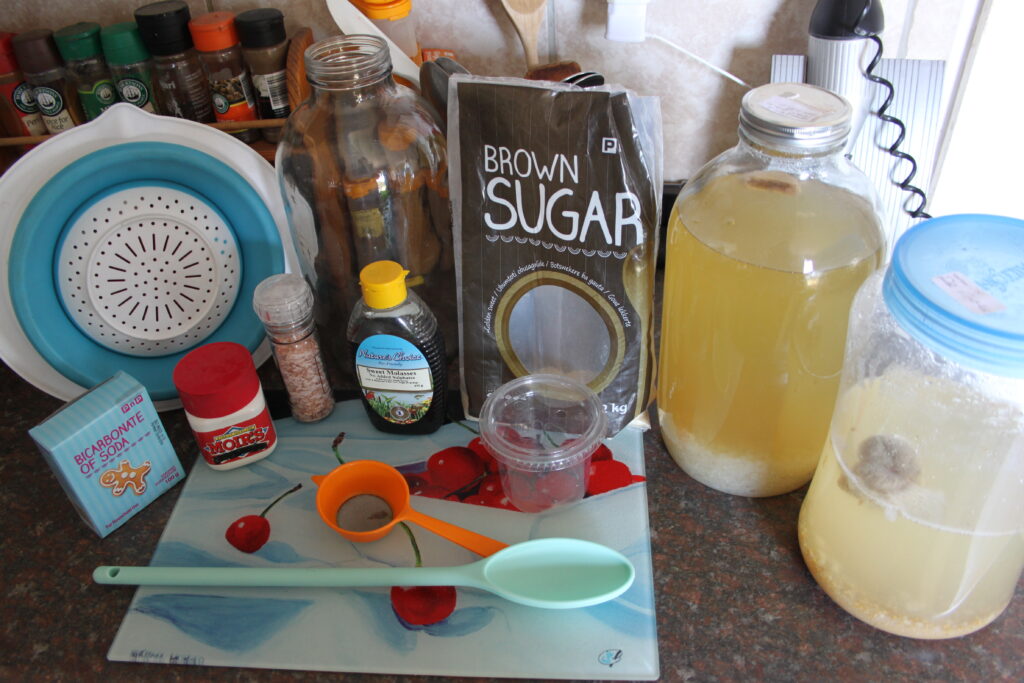
- Choose a suitable glass container,
- A large plastic or stainless-steel spoon must be sterilized before use by boiling for 10 minutes in water. Do not use the same implements without them being sterilized in between batches of Milk and water Kefir.
- A piece of cheesecloth to place over the mouth of the bottle or glass container.
- Suitable measuring cups.
- A glass container for the Kiefer grains.
- A large rubber band to go over the glass bottle’s neck.
- A large stainless-steel spoon.
- A stainless steel or plastic sieve.
Ingredients you’ll need for the Kefir
- 0.25 cups of sugar (brown or white) per litre of water
- Pink salt (Himalayan salt)
- Bicarbonate of soda
- Molasses
- Clean water
If you are using borehole water, you should pay attention to how much lime is in the water as this could cause an issue. This can be overcome by reducing the amount of Himalayan salt that you use.
If you use municipal water, I would let it stand for 24 hours to make sure the chlorine and whatever else they use has a chance to clear the water. The better alternative is to purchase bottled water.
Water Kefir Instructions
- In a sterilized one-litre jug pour in your 1 litre of water.
- Add 0.25 cup sugar
- Add 1/8 teaspoon Himalayan salt.
- Add 1/8 of a teaspoon of bicarbonate of soda.
- Add 1/8 teaspoon molasses.
- Stir the water until all the ingredients have properly dissolved.
- Pour the mixture into the jar that you have selected for your Kefir.
- Add your Kefir to the mixture and stir very gently, you do not want to break up the grains into small pieces.
Place the cheesecloth over the top of the bottle and stretch the elastic band over the cheesecloth to hold it in place. Now, place a bottle in a warm place that does not receive direct sunlight. (I leave mine on the counter and I place a dishcloth around it do you stop any light).
Leave the Kefir for two days and after two days you can take a spoonful of the liquid and test to see if it is to your taste. If it is still too sweet for you, leave it for another day and test again. Repeat this until it is to your taste. It can take up to 21 days for it to develop a strong Kefir taste (it also is far less sweet and much healthier for Diabetics as it has less sugar).
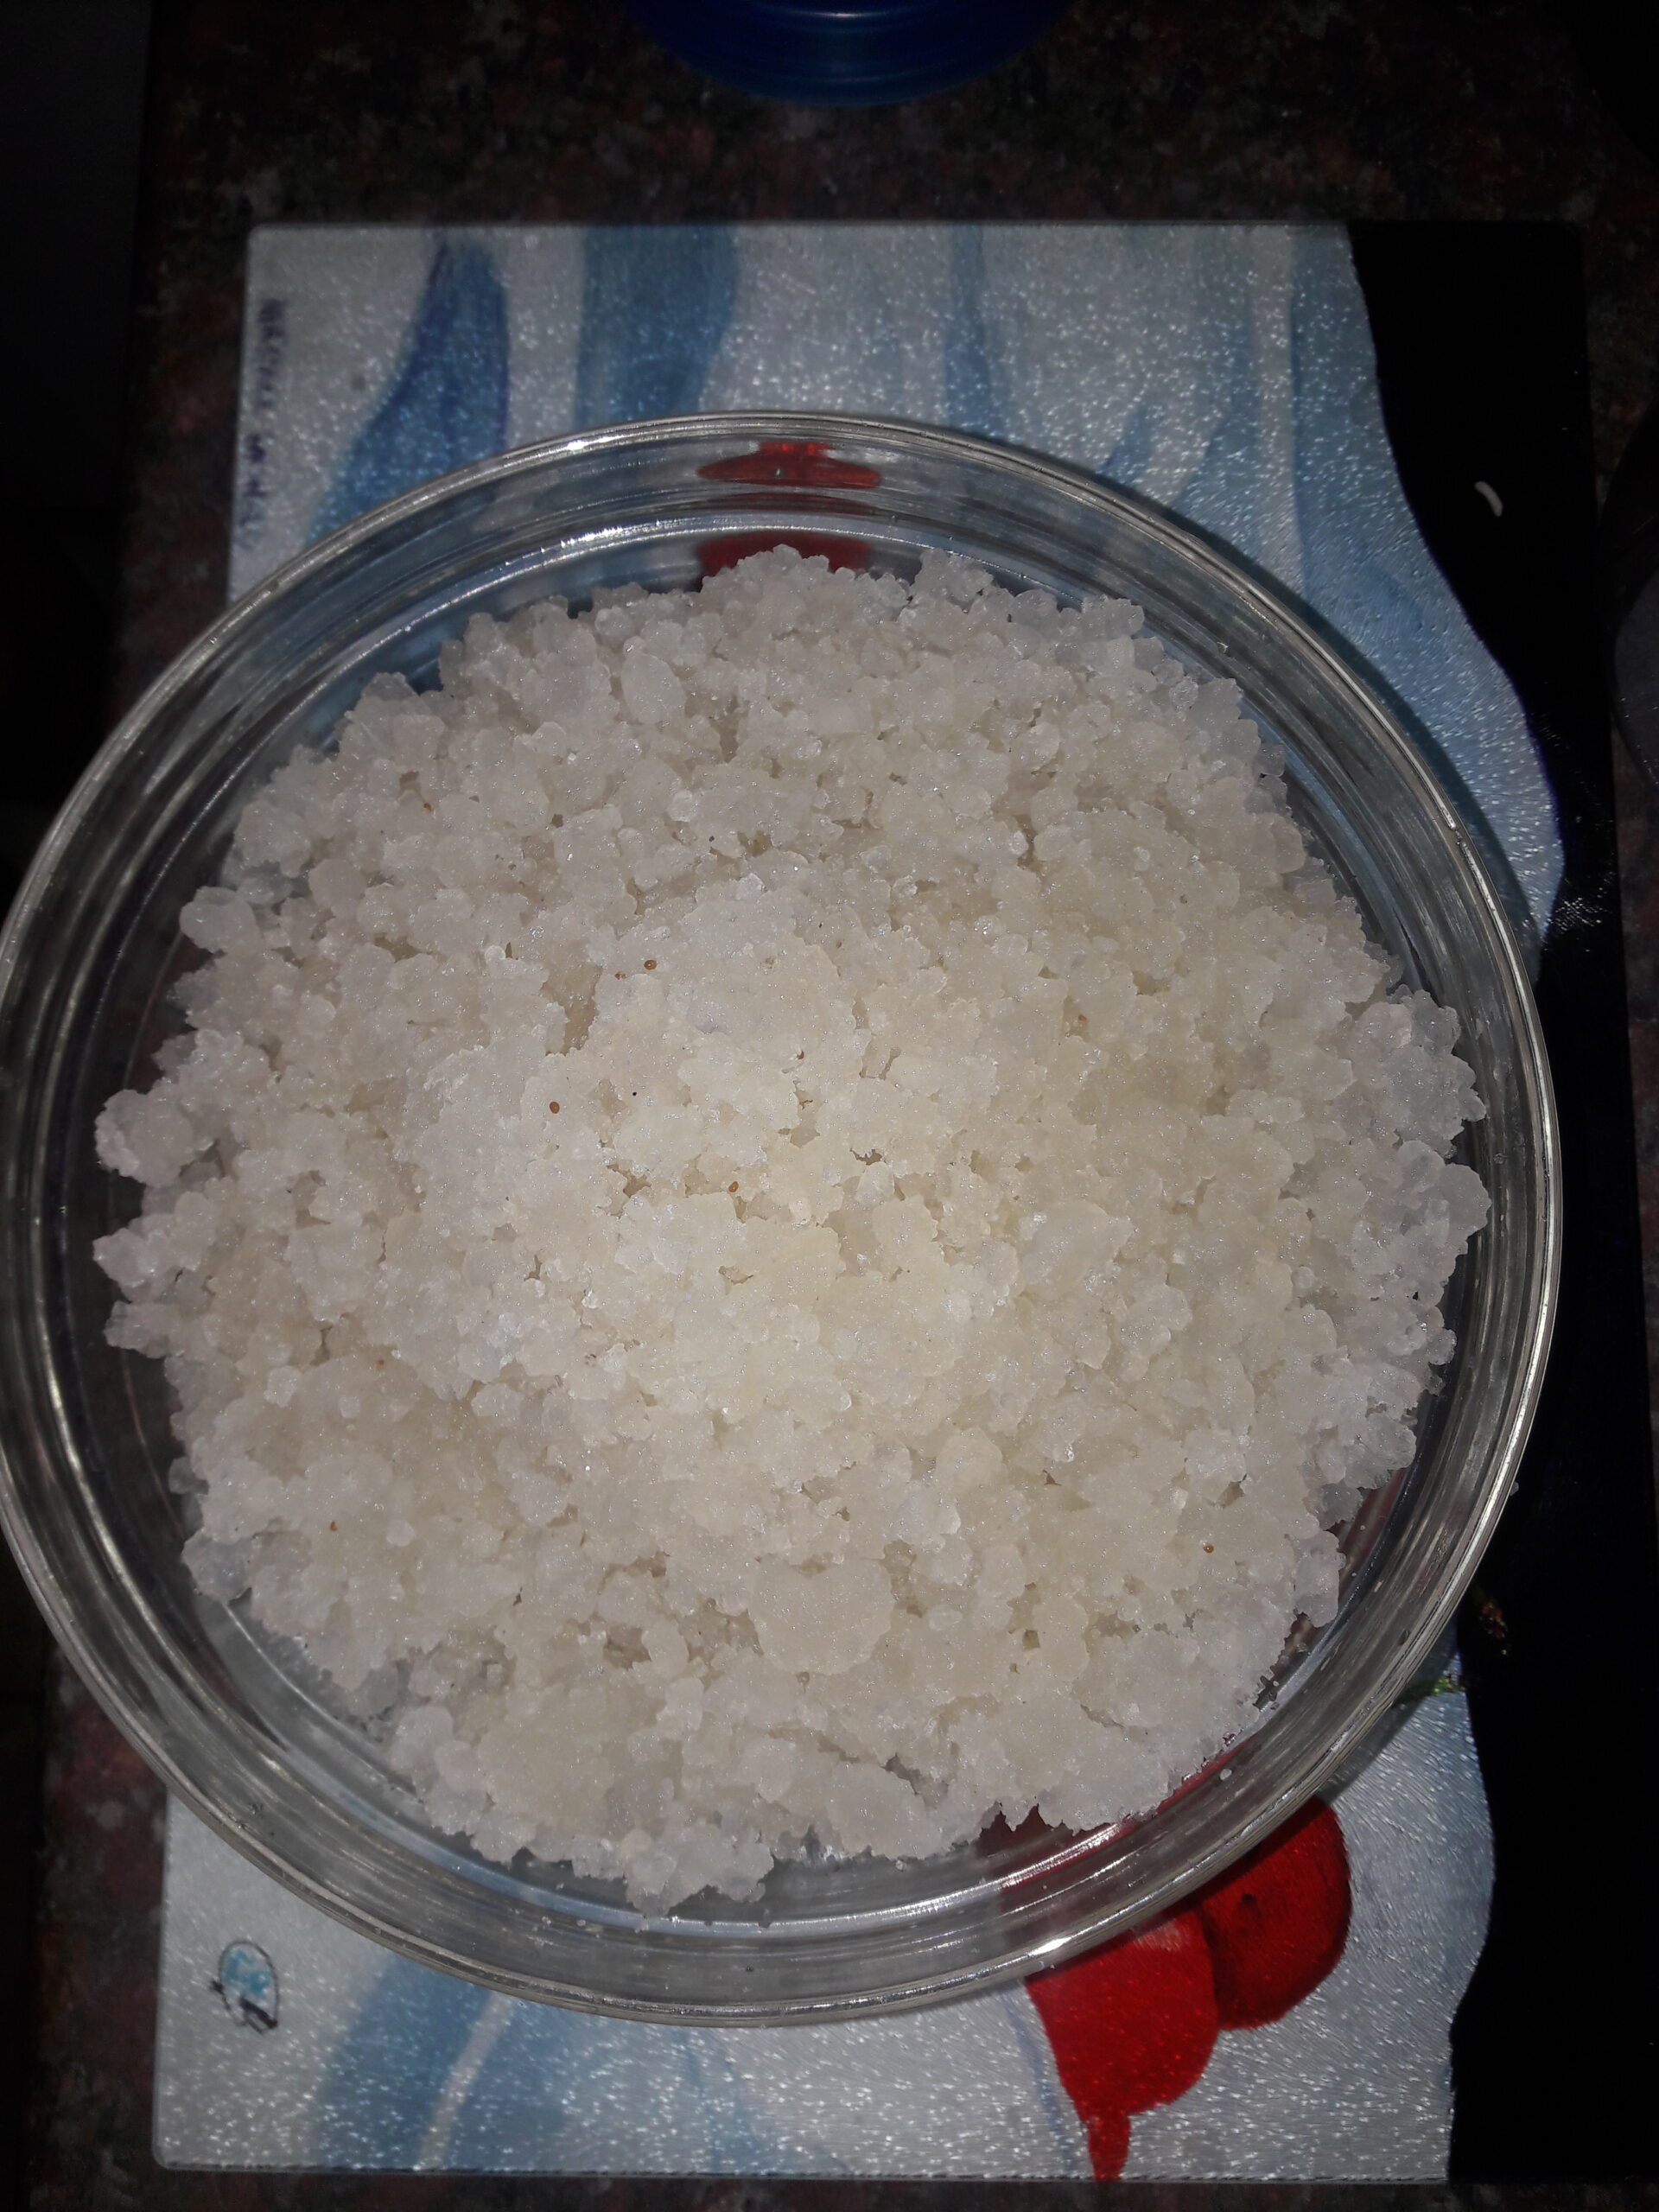
When the Kefir is to your taste, you can strain the Kefir grains out of the water and place them in a glass bowl. The Kefir liquid that you have now removed is ready to drink and can be bottled. I bottle mine and keep it in the refrigerator.
If you keep your Kefir in a cupboard or on a shelf, you will need to burp the bottle each day, that is to open the lid and release the gas. I would suggest that you do this two or three times a day. Even if you keep your Kefir in a refrigerator, I suggest you burp the bottle daily.
Second Ferment
The second ferment is where you add flavour and natural gas to your Kefir. To do this you add the fruit of your choice or fruit juice to your Kefir and let it ferment for 24 hours. After 24 hours you can taste the Kefir and see if it is to your liking. The longer it stands the more gas builds up and often better the flavor.

If you place whole fruit like pineapple, apples etc. in your Kefir for the second ferment, you need to remove the fruit from the Kefir after 48 hours. Remember to burp your Kefir two or three times a day as after the second ferment, it builds up gas very quickly and your bottles can burst.
If you have forgotten to burp your Kefir for a while, please be incredibly careful when opening the bottle as it could have some fairly serious effects when the bottle cap blows off the bottle and hits you in the face, and I am speaking from experience.
Now all that is left to do is to refrigerate and enjoy.
Oh yes! Don’t forget to go back to the beginning and put the grains that you separated into fresh sugar water.
Your grains will grow as you add them to fresh sugar water and eventually, you will have enough to increase the volume to 2 litres or 4 litres and so on.
There is no harm in eating the grains and the drink will be full of the small Kefir grains. As you leave your Kefir standing you might notice some little white grains growing in it. This is natural but you can strain them out or you can just consume them with the liquid. They are harmless and they are particularly good for you. This is where most of the benefits of the Kefir come from, the bacteria and yeast that make up the Kefir.
Enjoy
1 thought on “Water Kefir Instructions – How To Keep Water Kefir Healthy And Happy”
Comments are closed.